
Integration of UIKit into SwiftUI
You have already seen how UIHostingController can be used to integrate SwiftUI Views into UIKit. But how does it work
the other way round — how can views or view controllers from the UIKit world be integrated into SwiftUI? Why is this
even necessary? In the previous part of the series, we dealt with a modal view controller that dismisses itself and has
no connection to other view controllers. But it is also possible to migrate a view controller that is located in the
middle or at the beginning of a navigation sequence. Depending on the architecture used, you might want to link to a
UIKit view controller from within SwiftUI to navigate to it. Another reason might be that you want to insert a view
controller or a view from the UIKit world into a SwiftUI view. Since SwiftUI is a very recent framework, not all UI
controls available in UIKit are available in SwiftUI yet. For example, there is no alternative
to UIActivityViewController which can be used for example to share content from an app.
The solution to this problem is the UIViewRepresentable and UIViewControllerRepresentable protocols provided by
SwiftUI. With these protocols, UIKit views and view controller can be made SwiftUI compatible. When migrating the Image
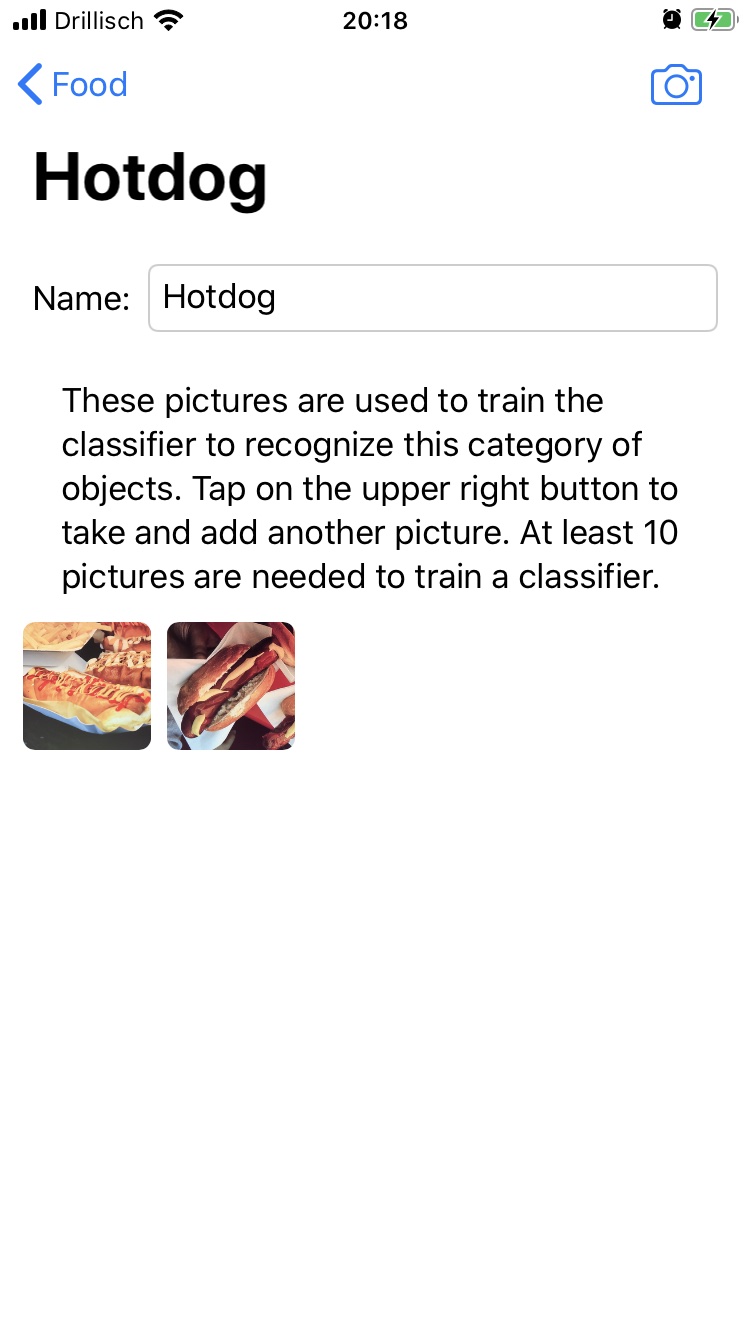
Recognition Playground app, the next step is to migrate the CategoryViewController. This view controller displays all
images that are assigned to a certain category of a data set (e.g. all hot dog images). As shown in the storyboard
below (bottom, second to last view controller), there are two navigation paths from the CategoryViewController to
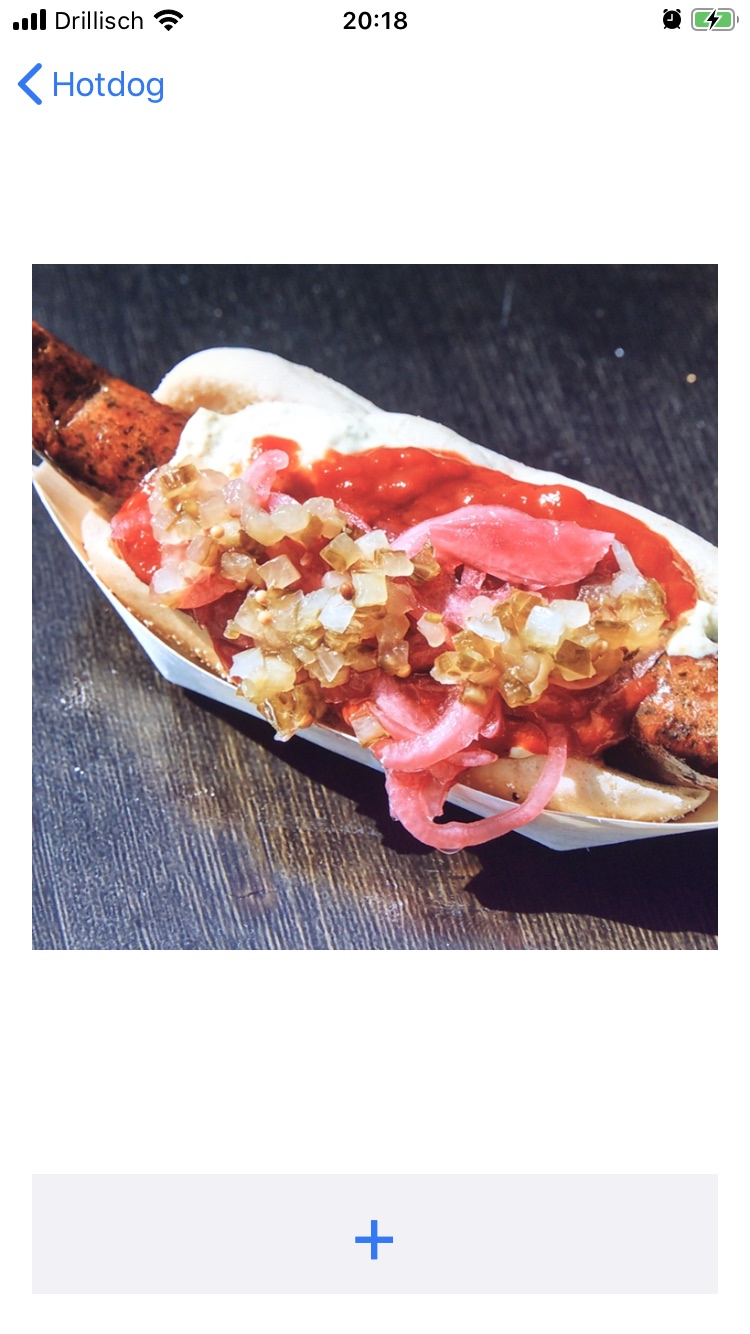
other view controllers. One of these is the CameraViewController used to take photos of objects to extend the existing
data set. Because this one should be migrated at a later point, its UIKit version should be used for the time being.
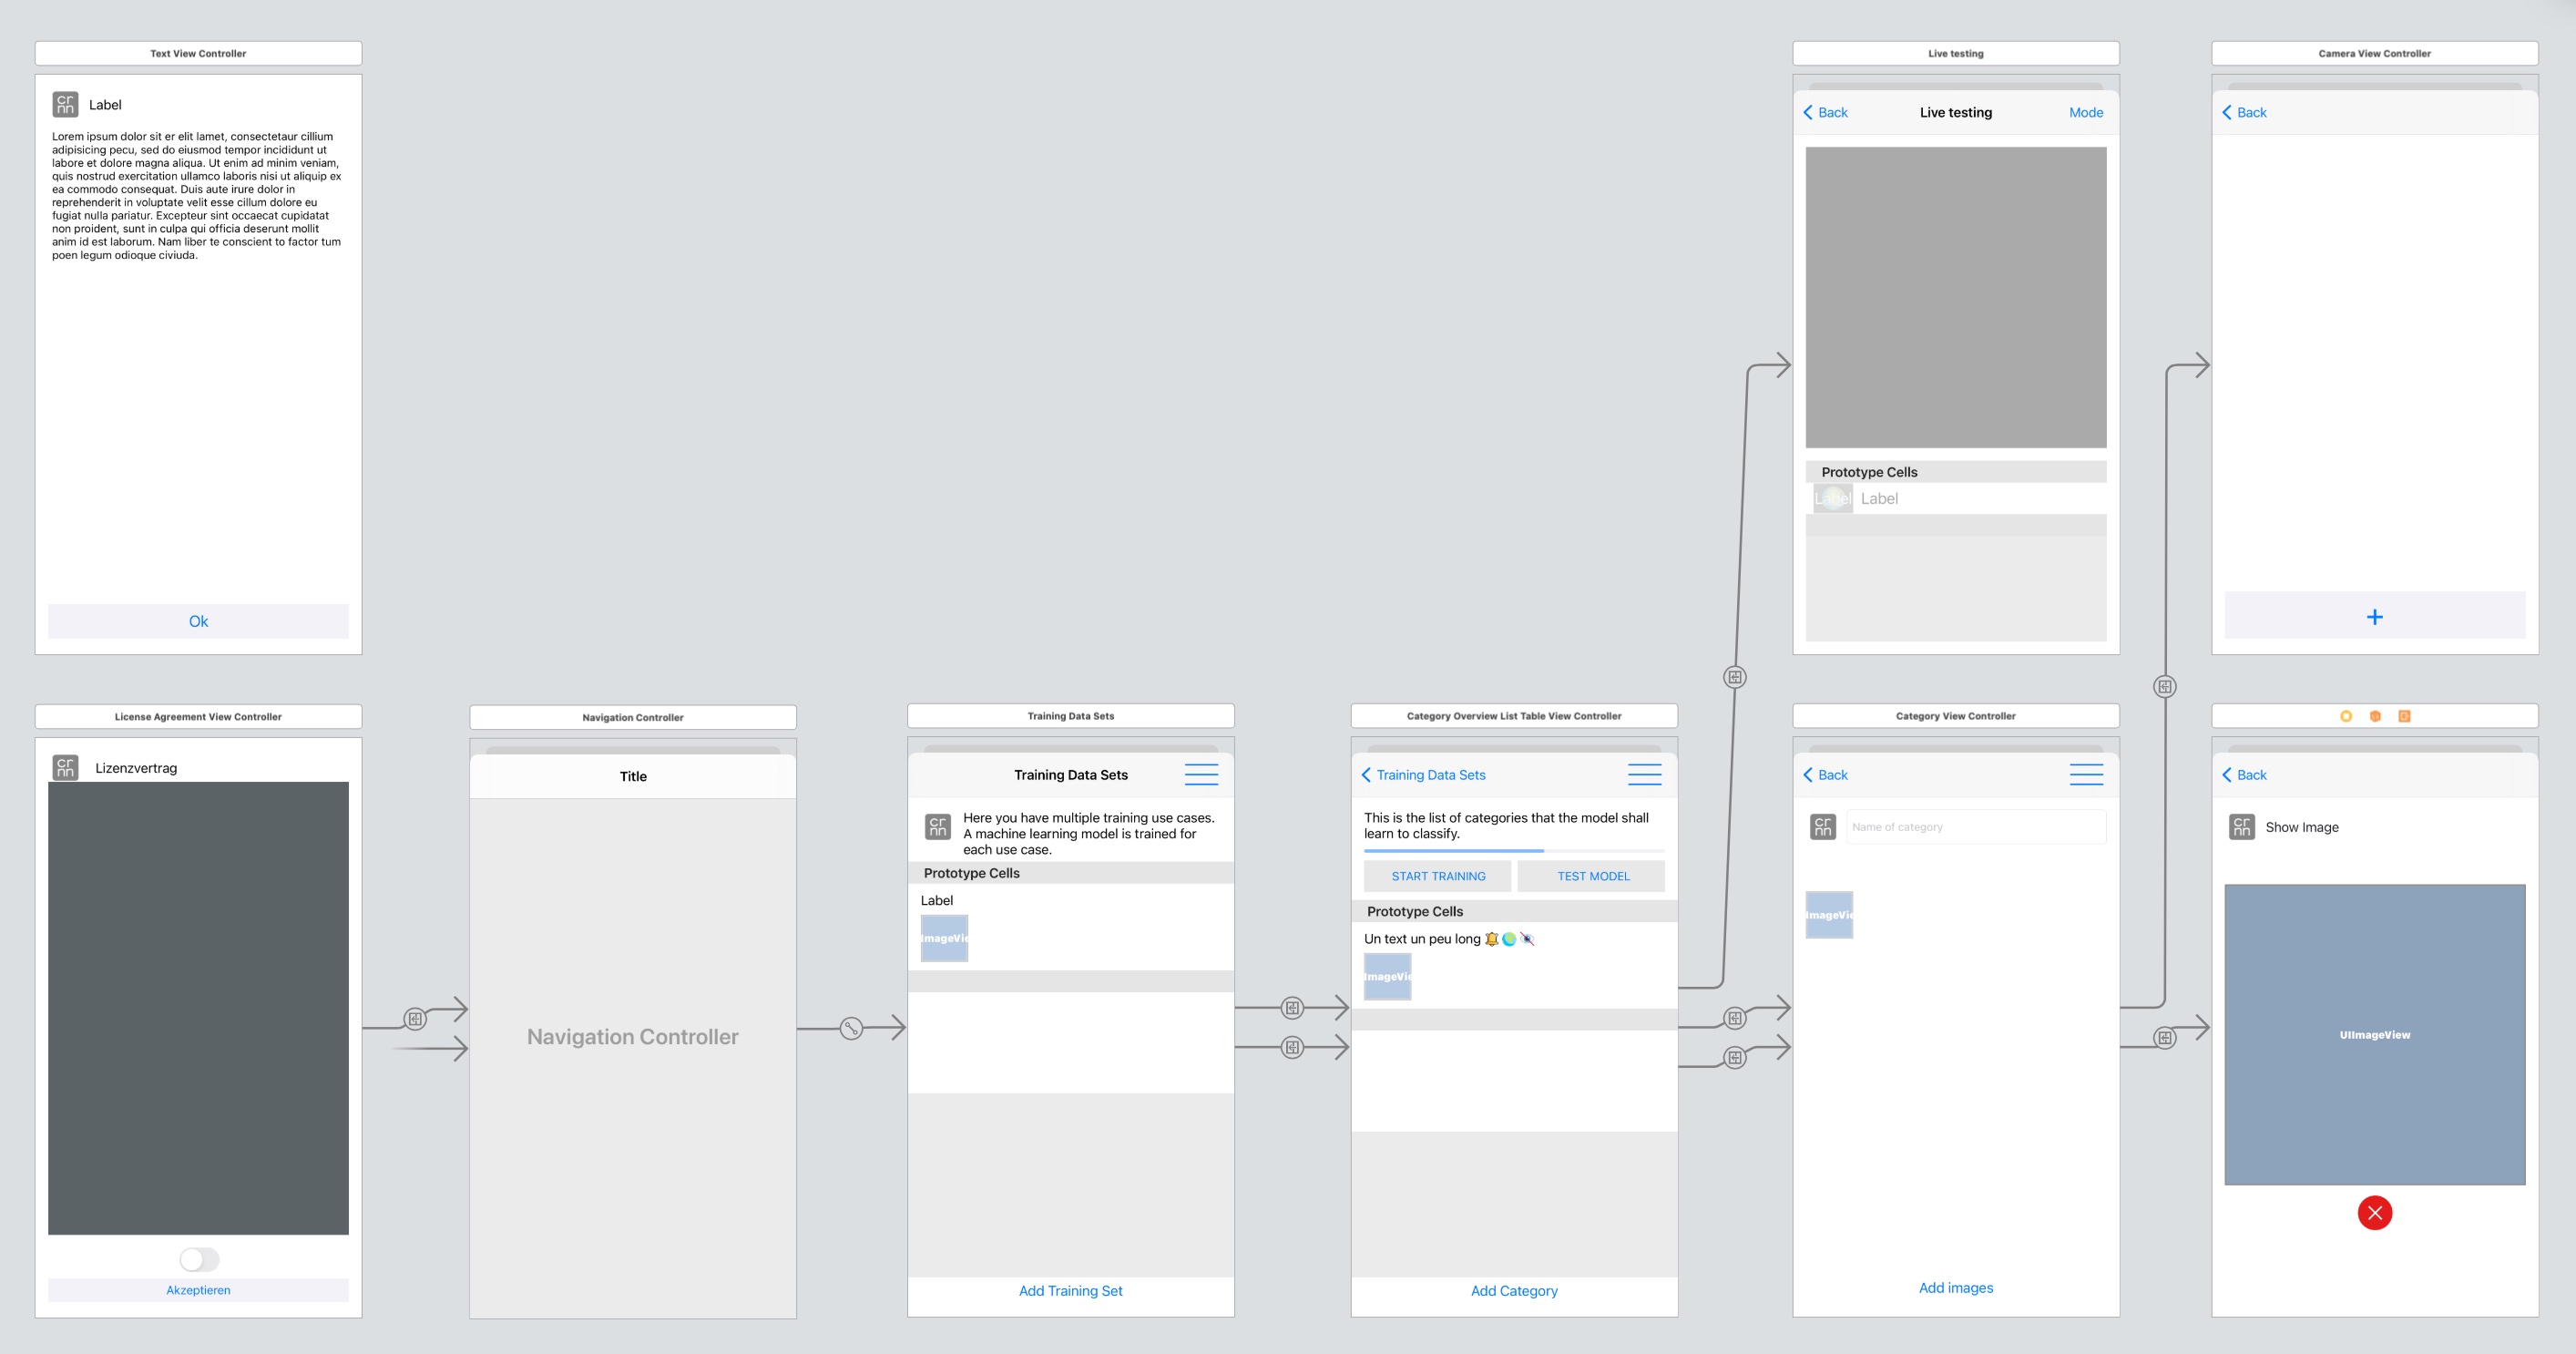
So, to be able to link to the CameraViewController from SwiftUI we use the UIViewControllerRepresentable protocol.
First, we create a new view CameraView which meets the requirements of the protocol by implementing the
methods makeUIViewController(context:) and updateUIViewController(_:context:). The former is used to initialize the
view controller and the latter to update it when a state in SwiftUI changes.
Whenever a new photo is shot, the CameraViewController calls the onPictureTaken(image:) method of
the CameraViewControllerDelegate protocol. To pass the new photos to a SwiftUI view we have to implement
a Coordinator which fulfils the requirements of the CameraViewControllerDelegate protocol and initialize it in
the makeCoordinator() method of the UIViewControllerRepresentable protocol. The CameraView is then provided with a
property handleTakenPicture of the type (UIImage) -> Void, i.e. a function which receives a UIImage. Every time
the coordinator is informed about a newly taken photo via the onPictureTaken(image:) method, it calls
the handleTakenPicture method and thus forwards the image.
import SwiftUI

typealias TakenPictureHandler = (UIImage) -> Void

struct CameraView: UIViewControllerRepresentable {
    var handleTakenPicture: TakenPictureHandler

    func makeUIViewController(context: Context) -> CameraViewController {
        let storyboard = UIStoryboard(name: "Main", bundle: nil)
        guard let cameraVC = storyboard.instantiateViewController(
          identifier: "CameraVC") as? CameraViewController else {
            fatalError("\(#function) Can't load CameraViewController")
        }
        cameraVC.delegate = context.coordinator
        return cameraVC
    }

    func updateUIViewController(_ uiViewController: CameraViewController,
                                context: Context) {}

    func makeCoordinator() -> Coordinator {
        Coordinator(handleTakenPicture: handleTakenPicture)
    }

    class Coordinator: NSObject, CameraViewControllerDelegate,
                       UINavigationControllerDelegate {
        var handleTakenPicture: TakenPictureHandler

        init(handleTakenPicture: @escaping TakenPictureHandler) {
            self.handleTakenPicture = handleTakenPicture
        }

        func onPictureTaken(image: UIImage) {
            handleTakenPicture(image)
        }
    }
}
When migrating the CategoryViewController to a SwiftUI version, we can now add a button in the form of
a NavigationLink, which navigates to the CameraView, which in turn represents the CameraViewController. While
initializing the CameraView, we can pass the handleTakenPicture method. In our case, this method forwards the image
to a view model.
NavigationLink(destination: CameraView() { image in
    DispatchQueue.main.async {
        self.manager.add(image)
    }
}) {
    Image(systemName: "camera")
    // ...
}
right: CameraView (SwiftUI) consisting of CameraViewController (UIKit)
Migration of the Entry Point and Navigation Controller
At a certain point in the migration process, the situation will arise where the initial view controller should be
migrated. For this purpose, the entry point of the app has to be adapted. The same applies if the
used NavigationController (UIKit) should be migrated to a NavigationView (SwiftUI).
The entry point is determined by the app lifecycle management. In the previous two iOS/iPadOS versions changes have been
made to this mechanism. On iOS/iPadOS 12 the lifecycle was monitored via the AppDelegate. With version 13 (where
SwiftUI was introduced) the SceneDelegate was established in addition to the AppDelegate to allow launching multiple
windows of an app. However, SceneDelegate is still a solution from the UIKit world. With iOS 14 a new SwiftUI-based
app lifecycle management was introduced, so that SceneDelegate and AppDelegate are no longer mandatory. The
disadvantage of this is that on the one hand, it does not yet offer all the features of the SceneDelegate
and AppDelegate solution and on the other hand, the deployment target has to be increased to iOS/iPadOS 14.
Because iOS/iPadOS 14 was released only recently when starting this series of blog posts, we use the solution compatible
with version 13 of the operating systems. However, the following shows how to migrate the entry point of a project
created before version 13 — i.e. one that is not yet equipped with SceneDelegate lifecycle management. First of all,
the initial view controller is made SwiftUI compatible using UIViewControllerRepresentable as described in the
previous post of the series. In the case of the Image Recognition Playground app, the DataSetLibraryViewController is
the initial view controller. If the corresponding view controller has already been migrated to a SwiftUI view, you can
proceed directly to the next step.
import SwiftUI

struct DataSetLibraryView: UIViewControllerRepresentable {

    func makeUIViewController(context: Context) -> DataSetLibraryViewController {
        let storyboard = UIStoryboard(name: "Main", bundle: nil)
        guard let dataSetLibraryVC = storyboard.instantiateViewController(
          identifier: "DataSetLibraryVC") as? DataSetLibraryViewController else {
            fatalError("\(#function) Can't load DataSetLibraryViewController")
        }
        return dataSetLibraryVC
    }

    func updateUIViewController(_ uiViewController: DataSetLibraryViewController,
                                context: Context) {}
}
Next, we create the MainView containing a NavigationView in which the initial view will be embedded.
import SwiftUI

struct MainView: View {
    var body: some View {
        NavigationView {
            DataSetLibraryView()
        }
    }
}
Now we just have to make sure that we do not load the initial view controller either from the storyboard or
programmatically, but the previously implemented MainView. For this purpose, we extend the existing AppDelegate
class with the following two methods:
// MARK: UISceneSession Lifecycle

func application(_ application: UIApplication,
                 configurationForConnecting connectingSceneSession: UISceneSession,
                 options: UIScene.ConnectionOptions) -> UISceneConfiguration {
    // Called when a new scene session is being created.
    // Use this method to select a configuration to create the new scene with.
    return UISceneConfiguration(name: "Default Configuration",
                                sessionRole: connectingSceneSession.role)
}

func application(_ application: UIApplication,
                 didDiscardSceneSessions sceneSessions: Set<UISceneSession>) {
    // Called when the user discards a scene session.
    // If any sessions were discarded while the application was not running,
    // this will be called shortly after application:didFinishLaunchingWithOptions.
    // Use this method to release any resources that were specific
    // to the discarded scenes, as they will not return.
}
Then we create a file SceneDelegate.swift with the following content:
import SwiftUI

class SceneDelegate: UIResponder, UIWindowSceneDelegate {

    var window: UIWindow?


    func scene(_ scene: UIScene,
               willConnectTo session: UISceneSession,
               options connectionOptions: UIScene.ConnectionOptions) {
        // Use this method to optionally configure and attach
        // the UIWindow `window` to the provided UIWindowScene `scene`.
        // If using a storyboard, the `window` property will
        // automatically be initialized and attached to the scene.
        // This delegate does not imply the connecting scene or session
        // are new (see `application:configurationForConnectingSceneSession` instead).

        // Create the SwiftUI view that provides the window contents.
        let mainView = MainView()

        // Use a UIHostingController as window root view controller.
        if let windowScene = scene as? UIWindowScene {
            let window = UIWindow(windowScene: windowScene)
            window.rootViewController = UIHostingController(rootView: mainView)
            self.window = window
            window.makeKeyAndVisible()
        }
    }

    func sceneDidDisconnect(_ scene: UIScene) {
        // Called as the scene is being released by the system.
        // This occurs shortly after the scene enters the background,
        // or when its session is discarded.
        // Release any resources associated with this scene
        // that can be re-created the next time the scene connects.
        // The scene may re-connect later, as its session was not
        // neccessarily discarded (see `application:didDiscardSceneSessions` instead).
    }

    func sceneDidBecomeActive(_ scene: UIScene) {
        // Called when the scene has moved from an inactive state to an active state.
        // Use this method to restart any tasks that were paused
        // (or not yet started) when the scene was inactive.
    }

    func sceneWillResignActive(_ scene: UIScene) {
        // Called when the scene will move from an active state to an inactive state.
        // This may occur due to temporary interruptions (ex. an incoming phone call).
    }

    func sceneWillEnterForeground(_ scene: UIScene) {
        // Called as the scene transitions from the background to the foreground.
        // Use this method to undo the changes made on entering the background.
    }

    func sceneDidEnterBackground(_ scene: UIScene) {
        // Called as the scene transitions from the foreground to the background.
        // Use this method to save data, release shared resources,
        // and store enough scene-specific state information
        // to restore the scene back to its current state.
    }
}
As you can see in the code, the MainView is embedded in an UIKit HostingController to make it UIKit compatible. This
is necessary because, as mentioned in the beginning, the AppDelegate and SceneDelegate lifecycle management comes
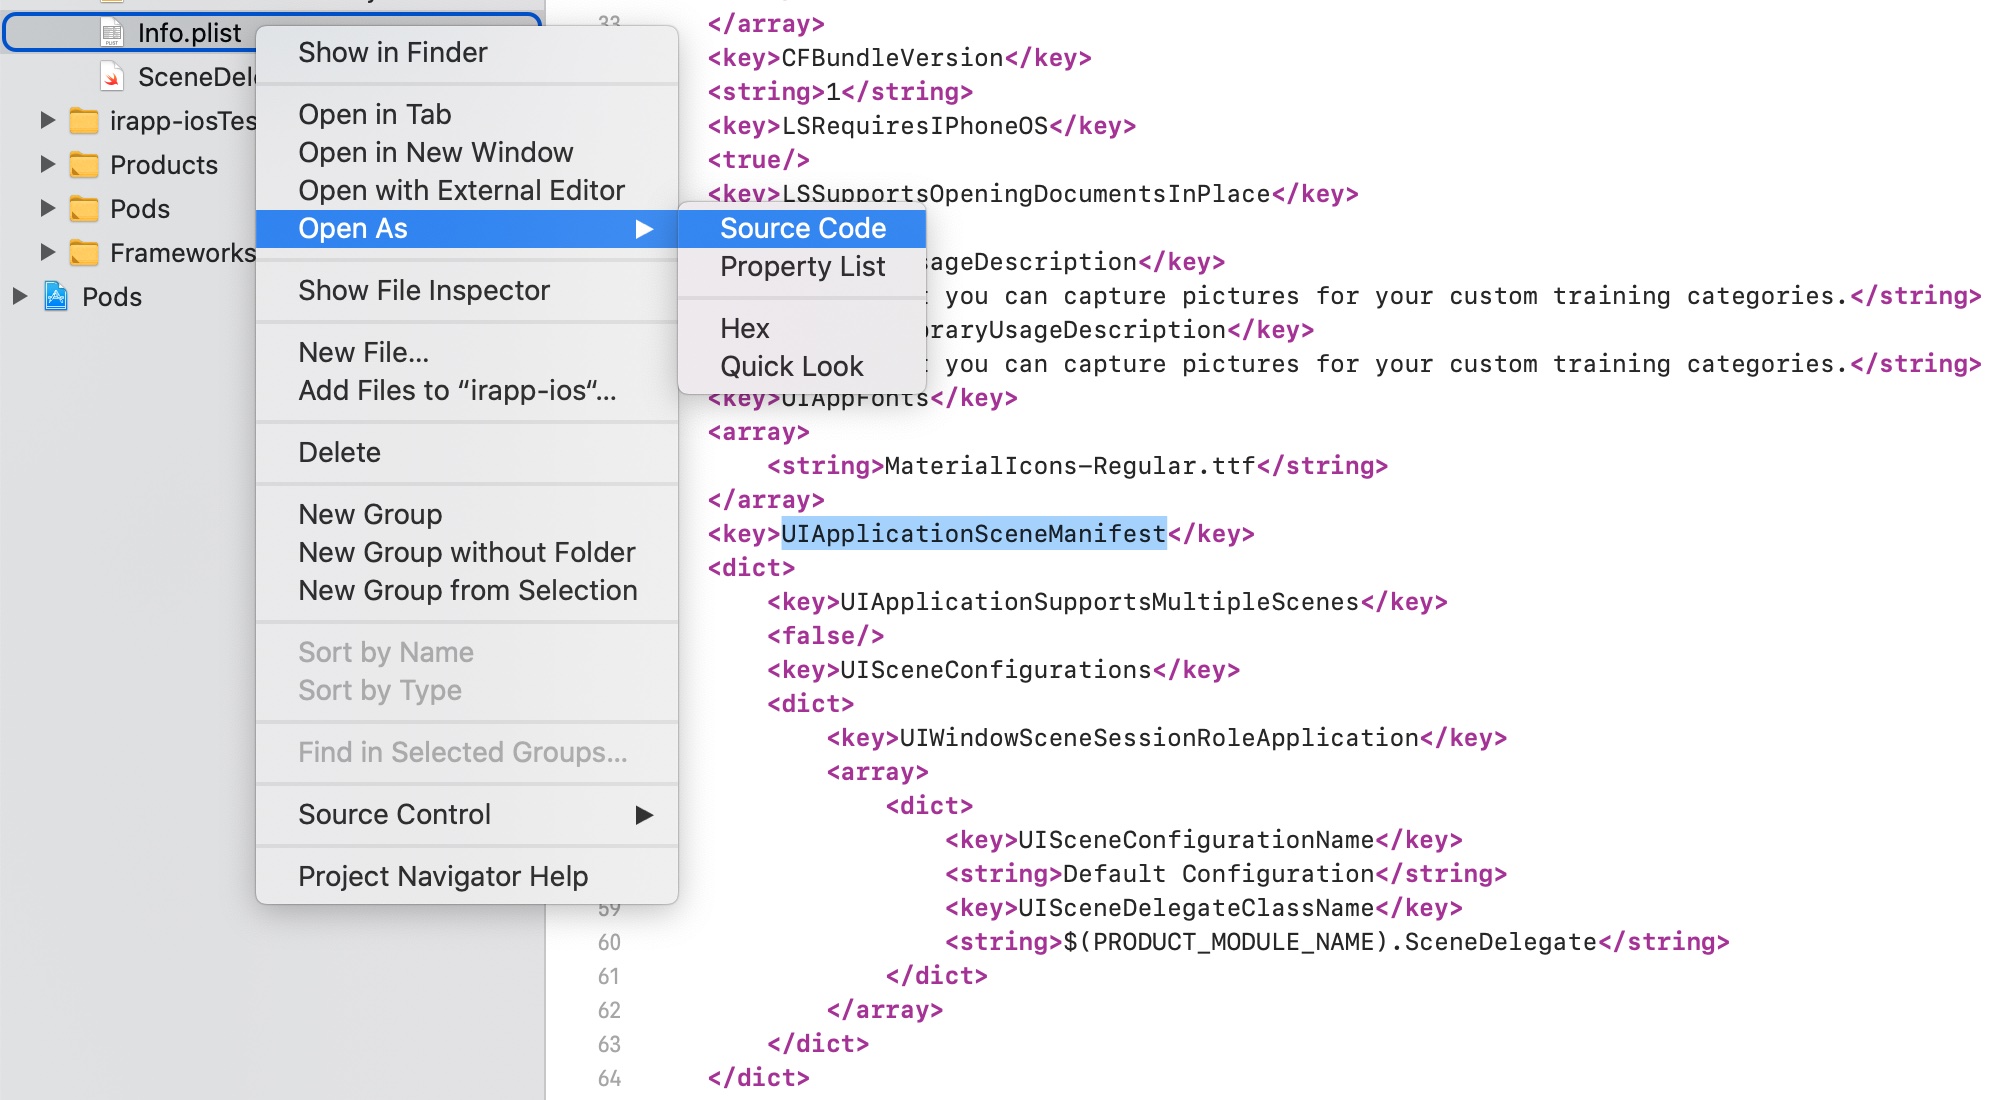
from the UIKit world and expects a view controller. As the last step, the Info.plist of the app has to be adjusted.
Therefore, we open the file as source code in Xcode: Right-click on Info.plist in the Project Navigator > “Open As” >
“Source Code”. After inserting the following code, the app should now load the MainView on start.
<key>UIApplicationSceneManifest</key>
<dict>
<key>UIApplicationSupportsMultipleScenes</key>
<false/>
<key>UISceneConfigurations</key>
<dict>
    <key>UIWindowSceneSessionRoleApplication</key>
    <array>
        <dict>
            <key>UISceneConfigurationName</key>
            <string>Default Configuration</string>
            <key>UISceneDelegateClassName</key>
            <string>$(PRODUCT_MODULE_NAME).SceneDelegate</string>
        </dict>
    </array>
</dict>
</dict>
If unexpected behavior occurs, it can be helpful to delete the app on the test device or simulator and reinstall it.
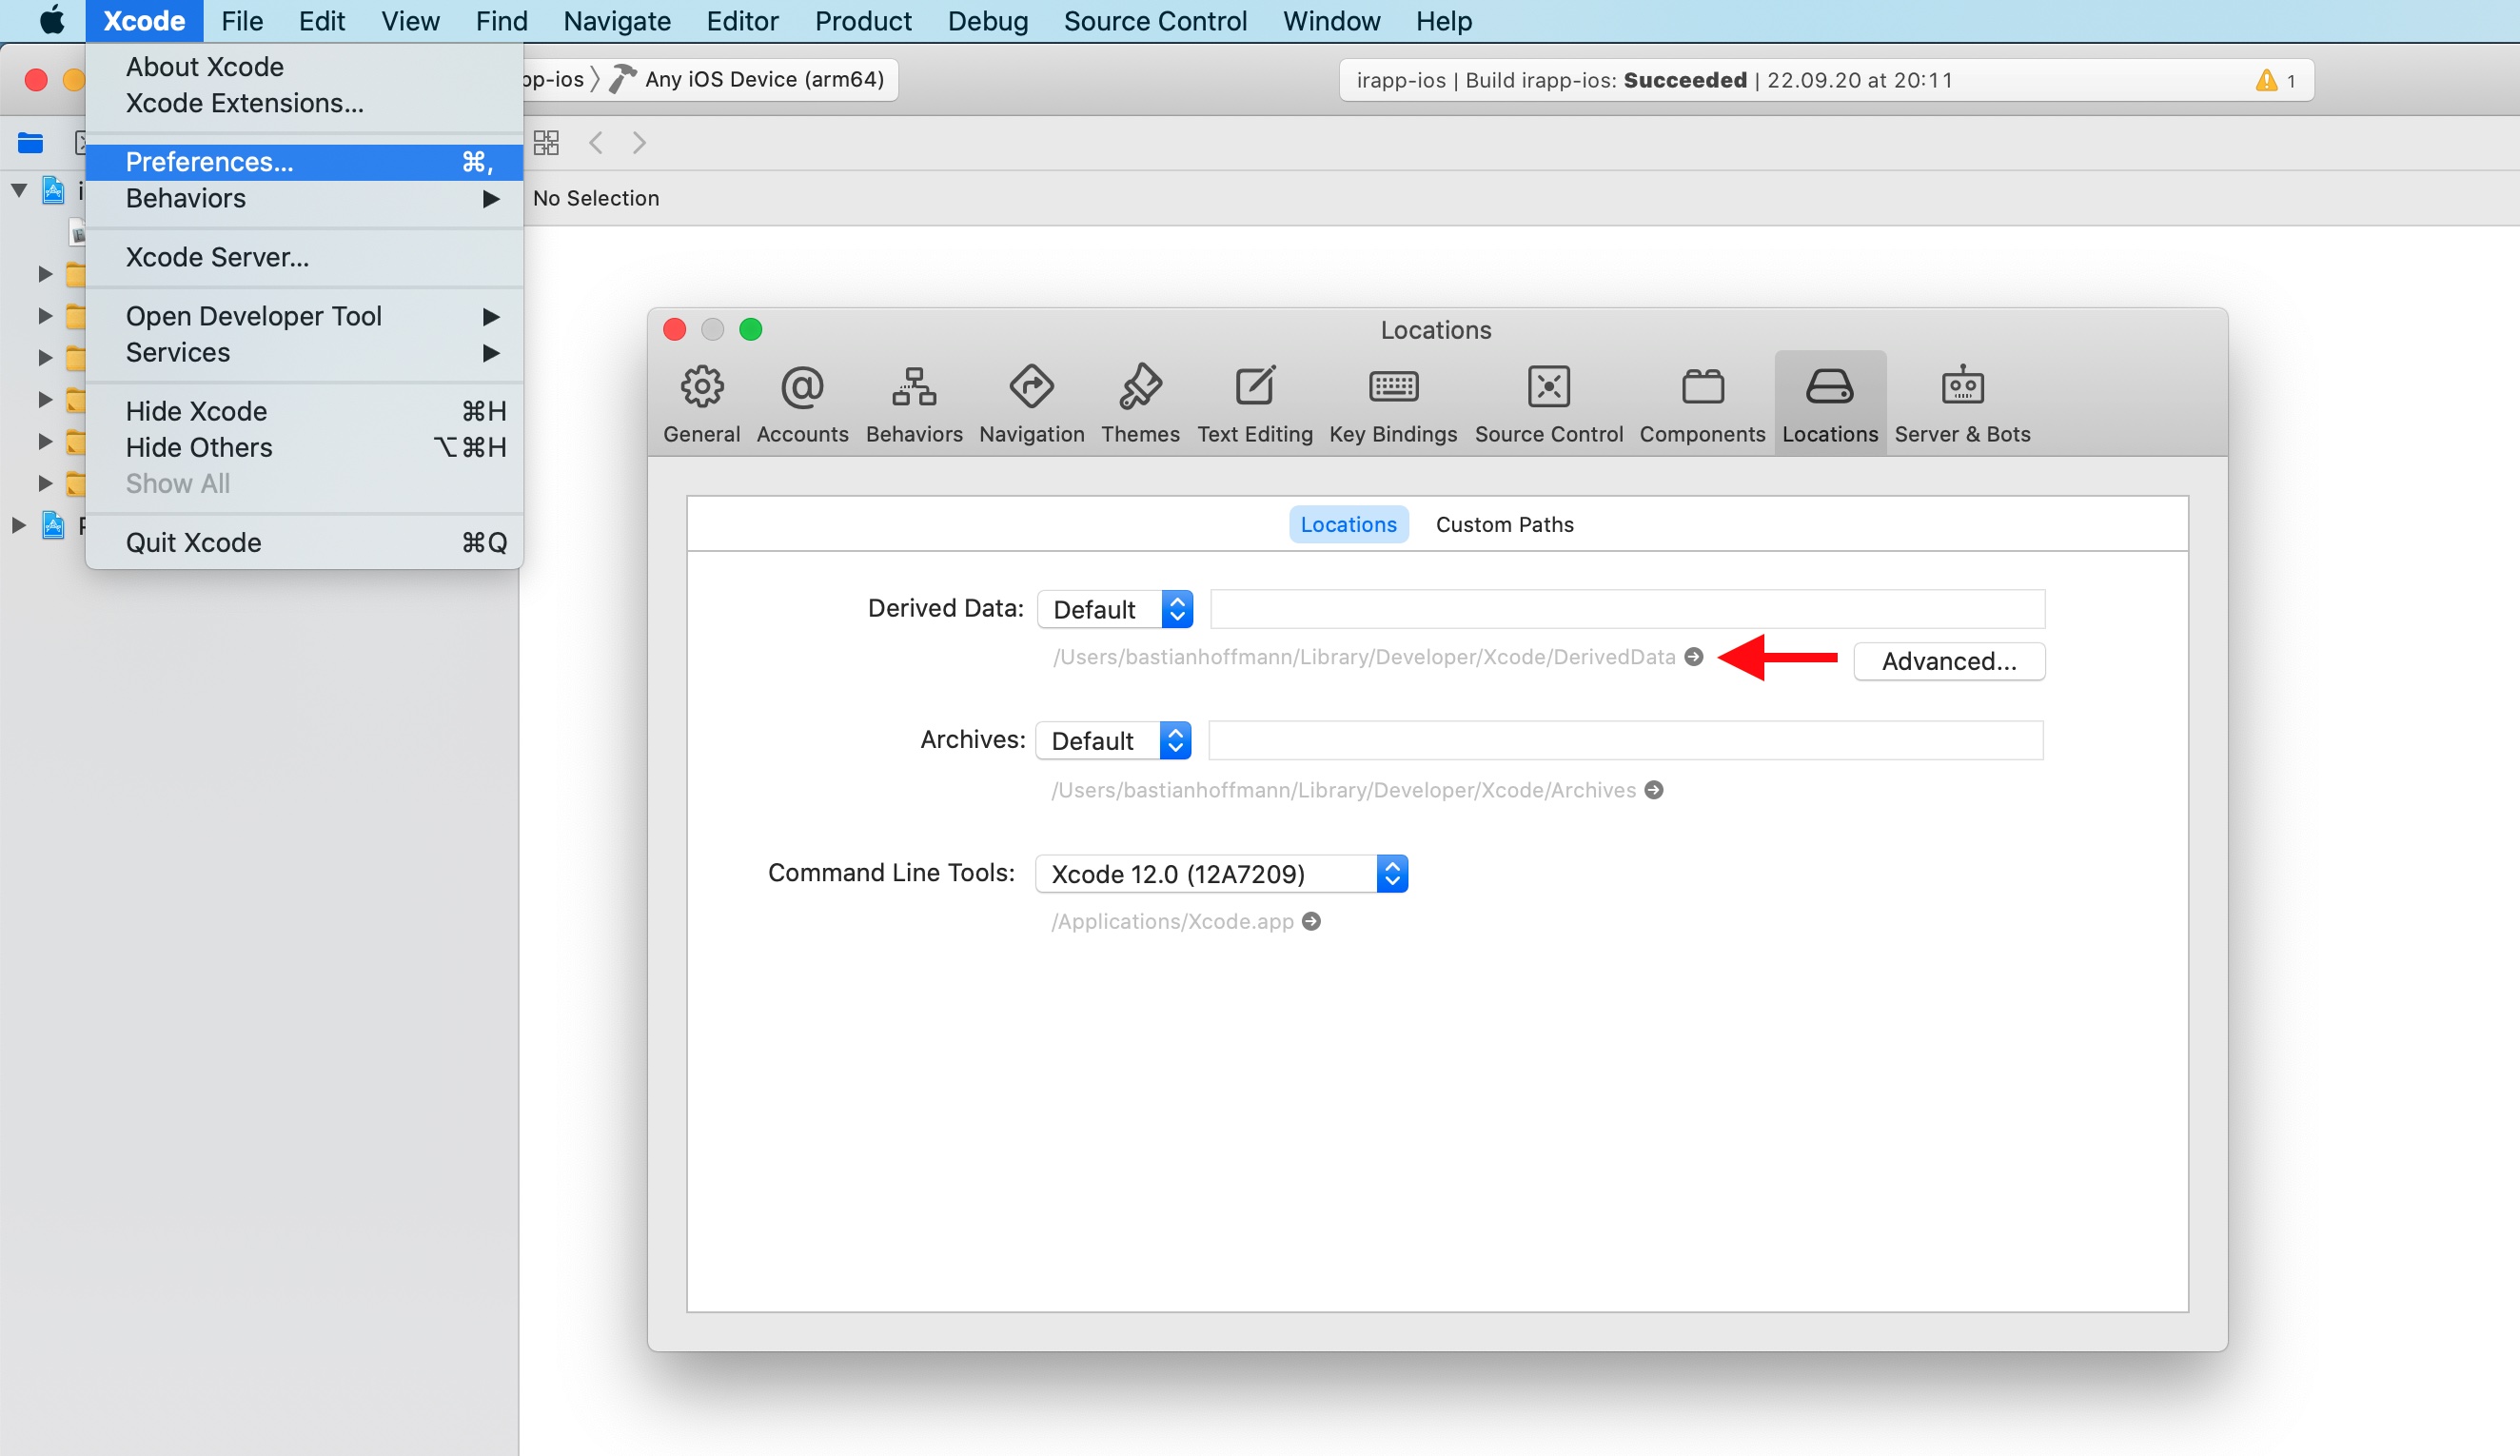
Another option is to delete the contents of the DerivedData folder. The corresponding path can be found in the Xcode
settings (“Xcode” > “Preferences” > “Locations”).
Further Information
In this blog post series, we presented the tools and settings needed to migrate an app from UIKit to SwiftUI. To quickly get started with SwiftUI, Apple offers some resources. For example, there are written step-by-step instructions with code examples or video tutorials of the Worldwide Developer Conference. To begin with, you can use the Talk »Introduction to SwiftUI«. Further videos deal e.g. with this year’s innovations in SwiftUI as well as with the new SwiftUI-based App Lifecycle Management mentioned in this blog post.